
How to Import Members to Your Pickleball Club
How to Import Members to Your Pickleball Club
Importing members into your pickleball club is a fast way to build an accurate roster without manual entry. The process uses a CSV upload to bring in member details like names, emails, phone numbers, membership plans, and start/end dates. With the right template formatting and plan mapping (optional), most imports can be completed in minutes with clear reporting for new members, linked accounts, and errors.
What Is a Club Member Import?
A club member import is a bulk upload process that adds or links member records inside your club system using a CSV file.
A successful import can include fields such as:
• Name
• Email
• Phone number
• Membership plan assignment
• Membership number ID
• Start date
• End date
This import process helps clubs:
• Save time compared to manual entry
• Reduce data entry mistakes
• Keep membership plans and dates consistent
• Create or link user accounts automatically
For example, if you’re migrating from another club platform, you can keep your existing membership IDs, add renewal dates, and assign members into the correct plan during the upload.
How Does Importing Members Work?
The import process has three phases: prepare the template, upload the CSV, and confirm/process the import. Each phase includes checks to link existing users, create new accounts, and flag errors.
Step 1: Prepare What You Need Before You Begin
Gather these items before starting:
• A computer with Google Sheets or Microsoft Excel
• Your club administrator login
• Your membership list (with columns for name, email, phone, and any plan assignments)
• A CSV export or the official import template saved in CSV format
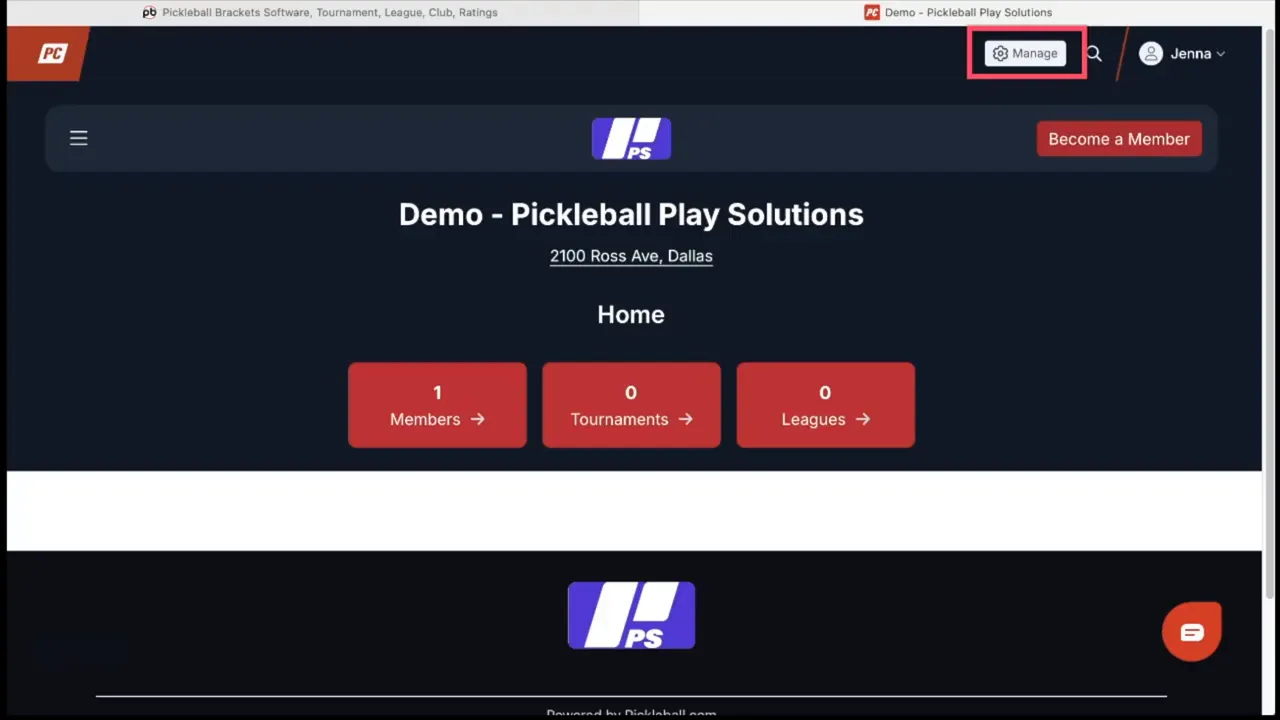
Step 2: Access the Club Management Area
• Log into your account
• Go to your club
• Open the management menu
• Navigate to the member upload section
• Choose the option to upload a new file
-
Step 3: Download and Inspect the Template
• Use the provided template link
• Open it in Google Sheets or Excel
• Review which fields are required vs optionalTypical requirements:
• Required fields usually include name and email
• Optional fields may include plan assignments, member IDs, and dates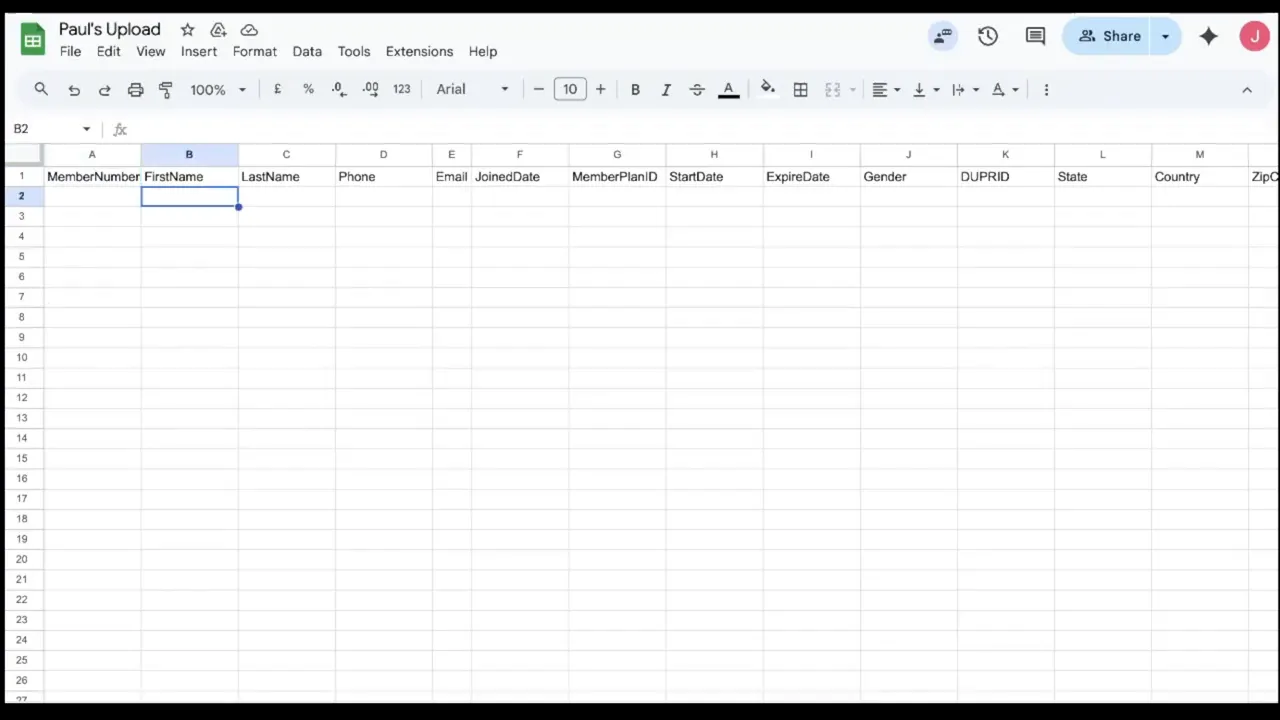
-
Step 4: Populate the Template Correctly
Copy and paste your membership data into the template.
Important tips:
• Use the membership number ID if you want to retain IDs from previous software
• Use the start date to mark when the membership began
• Leave the end date blank for memberships that auto renew, or enter an explicit expiration dateEmail accuracy matters most. Duplicate or incorrect emails are the most common source of import errors.
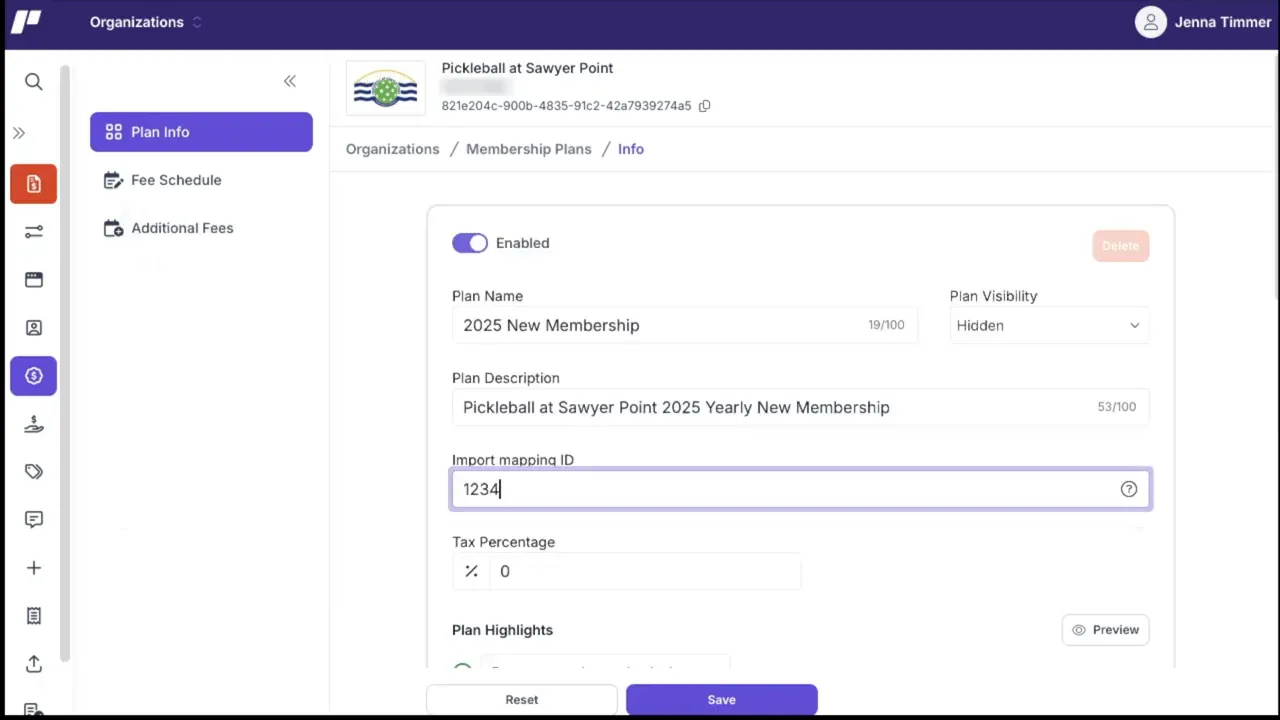
Step 5: Map Membership Plans (Optional)
If your club uses membership plans, assign each plan a simple import mapping ID and place that code into the spreadsheet for each member.
To find or set a mapping ID:
• Open the membership plans area in your club management
• Click the three dots next to a plan and select plan info
• Choose a mapping ID to use as the code in your spreadsheet (for example, 1, 2, 3, 4)Repeat for each plan so members are imported into the correct plan. If you do not use plans, skip this step and assign plans after import if needed.
-
Step 6: Export as CSV and Upload
Once the sheet is ready:
• Download/export as a CSV file
• Return to the club import page
• Click continue to move to the upload step
• Select your CSV file
• After upload completes, click continue, then process to start the import
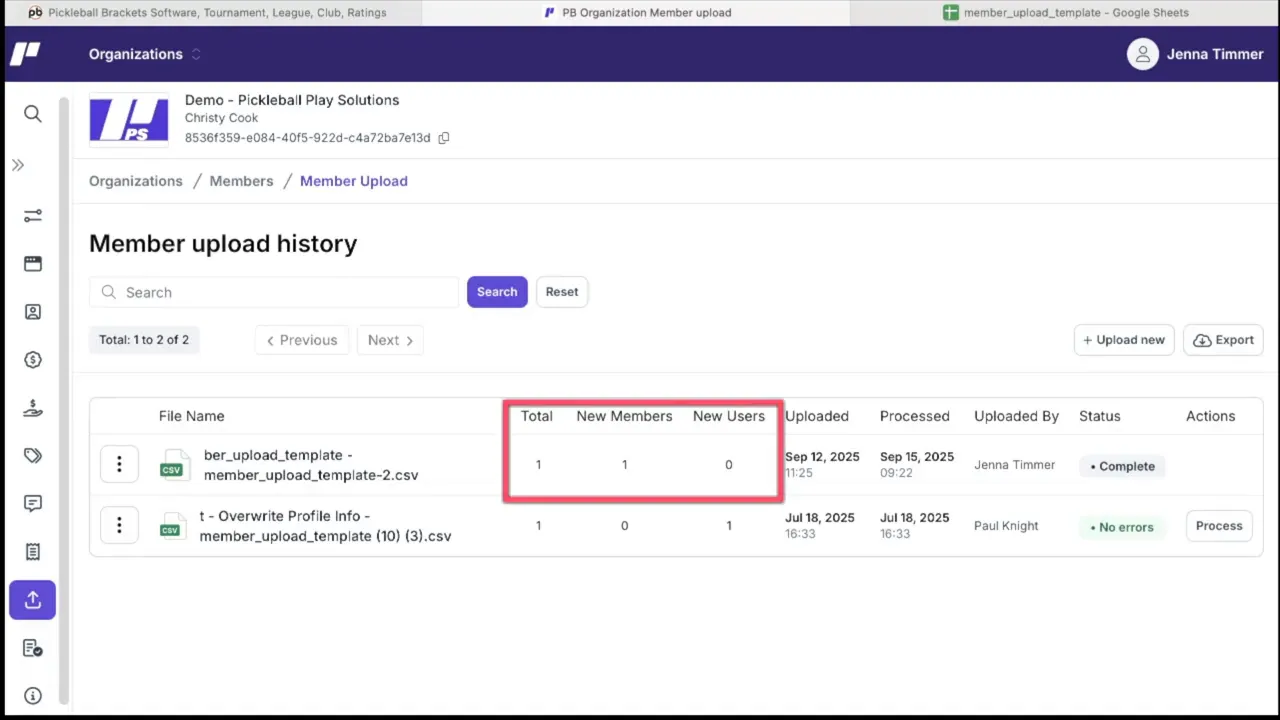
Step 7: Confirm and Review Results
Before finalizing, the system prompts a confirmation.
After confirming, review the import summary, which includes:
• The file name that was imported
• How many new members were added
• How many new user accounts were created in the system
• Timestamp of when the import processed -
Why Is Importing Members Important?
Bulk importing members keeps your roster accurate and reduces administrative workload during onboarding, migrations, and season setup.
Without a clean import process, clubs often face:
• Manual entry errors
• Missing emails or mismatched accounts
• Confusion around membership dates and renewals
• Extra support time spent fixing records
A properly formatted import creates consistent member records and ensures members receive the correct invitations and plan assignments.
What Are the Key Benefits of Importing Members by CSV?
Benefit #1: Faster onboarding and migrations
Upload hundreds of members at once instead of entering them individually.
Benefit #2: Cleaner membership records
Start/end dates, IDs, and plan assignments stay consistent when properly formatted.
Benefit #3: Automatic account linking and invites
Existing users are linked by email, and new accounts receive pending invitations and password setup instructions.
Common Questions About Importing Members
How long does a membership import take?
Most imports take only a few minutes once your template is correctly formatted. Larger files may take longer to process, but you’ll receive a summary after completion.
What tools do I need to import members?
You need a computer with Google Sheets or Excel, club admin access, and your membership list formatted into the provided template and exported as CSV.
What happens if a member’s email already exists?
If the email exists in the system, the member is linked to their existing account and appears as a current club member.
What happens to members who don’t already have an account?
New accounts are created and placed in an unconfirmed list with a pending invite. Those users receive an email to set their password and a separate invitation to join the club.
What causes import errors most often?
The most common issues are:
• Duplicate emails already in use elsewhere
• Missing required fields (name or email)
• Incorrect date formats
Handling Errors and Conflicts
If an error occurs, the system identifies the row and explains the issue.
To resolve errors:
• Correct the spreadsheet values
• Re-upload only the corrected file
• Retry the import after errors are fixed
Failed entries appear in an error report so you can fix them and try again.
Post-Import Management
After importing, you can manage member records directly in the members list.
From the members list:
• Click the three dots next to a member’s name
• Change plan assignments
• Update contact details
• Resend invitations for unconfirmed users
Resending invites helps new users who missed the initial email or haven’t completed account setup. The system also sends a welcome email to new accounts so members know their profile was created.
Best Practices and Troubleshooting Tips
• Validate emails before import to reduce conflicts
• Use simple mapping IDs for membership plans to avoid mismatches
• Keep backups of your original membership list for cross-checking
• Test with a small file first during large migrations
• Document start and end dates so renewals and expirations behave correctly
Quick Checklist Before Uploading
-
Confirm required fields are populated
-
Assign mapping IDs for membership plans (if used)
-
Save the spreadsheet as CSV
-
Upload, confirm, and review the import summary
-
Fix any errors and re-upload if necessary
Key Takeaways
• Member imports use a CSV to quickly build a clean club roster
• Email accuracy is the most important factor for correct linking
• Mapping IDs help assign members to the correct plans during import
• The system links existing users, creates new accounts, and flags errors
• Post-import tools let you edit records and resend invitations
Need Additional Help?
For a complete step-by-step walkthrough, view the full tutorial at:
With a little preparation, bulk importing members becomes a fast and reliable way to keep your club roster current and organized.
Related articles

How to Erne, ATP, and backhand counter like the pros
Hayden Patriquin and Dylan Frazier were among several players to share their secrets.
3 hours ago
-Victoria Radnothy

The Real Secret to Reaction Time: How to See Shots Before They Happen
8 hours ago
-Guest Author

Master the forehand speed-up: The shot that changes everything
Some shots win points, but others completely change the way a rally unfolds.
11 hours ago
-Pickleball.com Staff

The pickleball drills pros rely on
Take it from the best in the game.
1 day ago
-Victoria Radnothy