.jpg?width=1320&height=528&optimizer=image)
Verifying Events with Live Console
Verifying Events with Live Console: A Step-by-Step Guide for Tournament Directors
Organizing a successful pickleball tournament requires careful preparation and attention to detail. One of the most important steps before tournament day is verifying your events in the Live Console. This process confirms that all event settings, teams, formats, and match details are finalized so everything runs smoothly once play begins.
In this guide, we’ll walk through how to verify events step-by-step and review how the process works for different event types such as round robin, double round robin, multi-pool events, and elimination brackets.
Introduction to Event Verification
Event verification takes place after registration closes. At that point, the system pulls in all information from your event setup so you can review and finalize every detail.
Before verifying events, it is highly recommended to run your tournament through the Tournament Simulator. This tool helps you:
• Estimate match timing
• Confirm your court capacity
• Adjust event start times
• Prevent scheduling conflicts
While using the simulator is not mandatory, it can significantly reduce the risk of overbooking courts or running matches too late.
If you’re unfamiliar with the simulator, training videos are available on our YouTube channel.
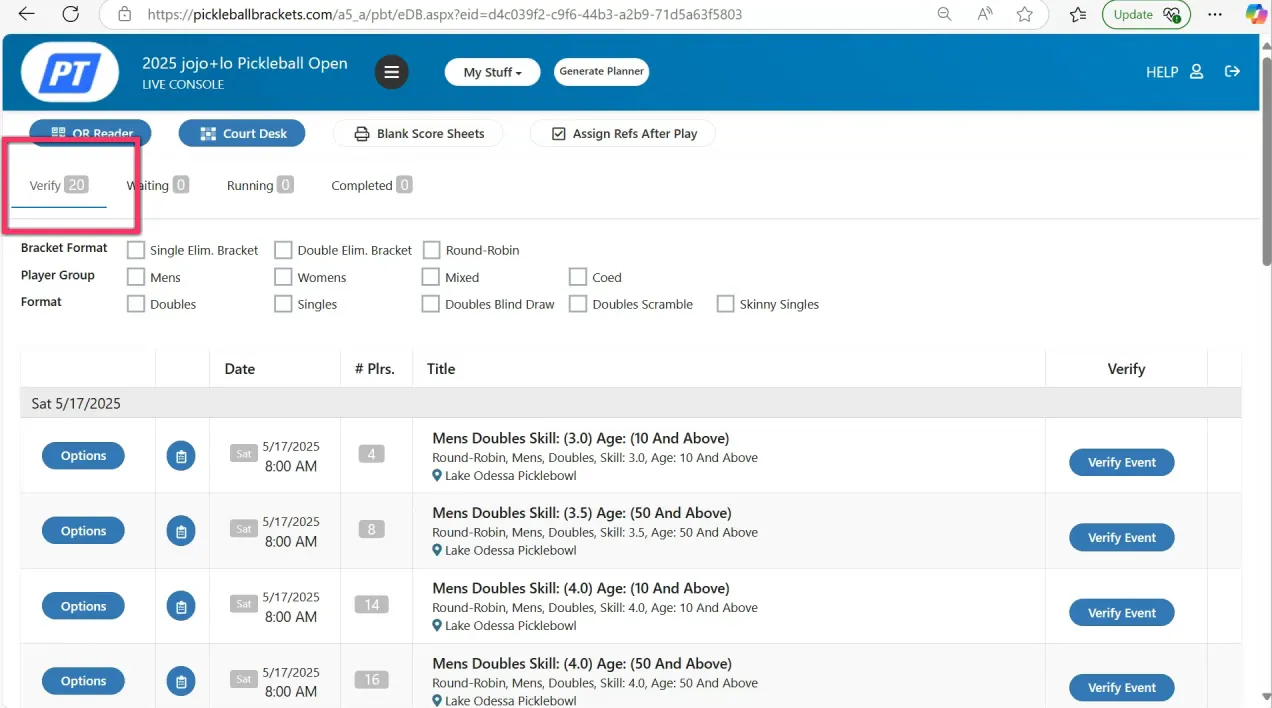
Step 1: Access the Live Console and Begin Verification
Once registration has closed, go to your Live Console where you will see all events waiting to be verified.
Important things to know before starting:
• Events can be verified in any order
• Every event must be verified before tournament day
• Teams without partners or payment may be automatically withdrawn
To begin verification:
-
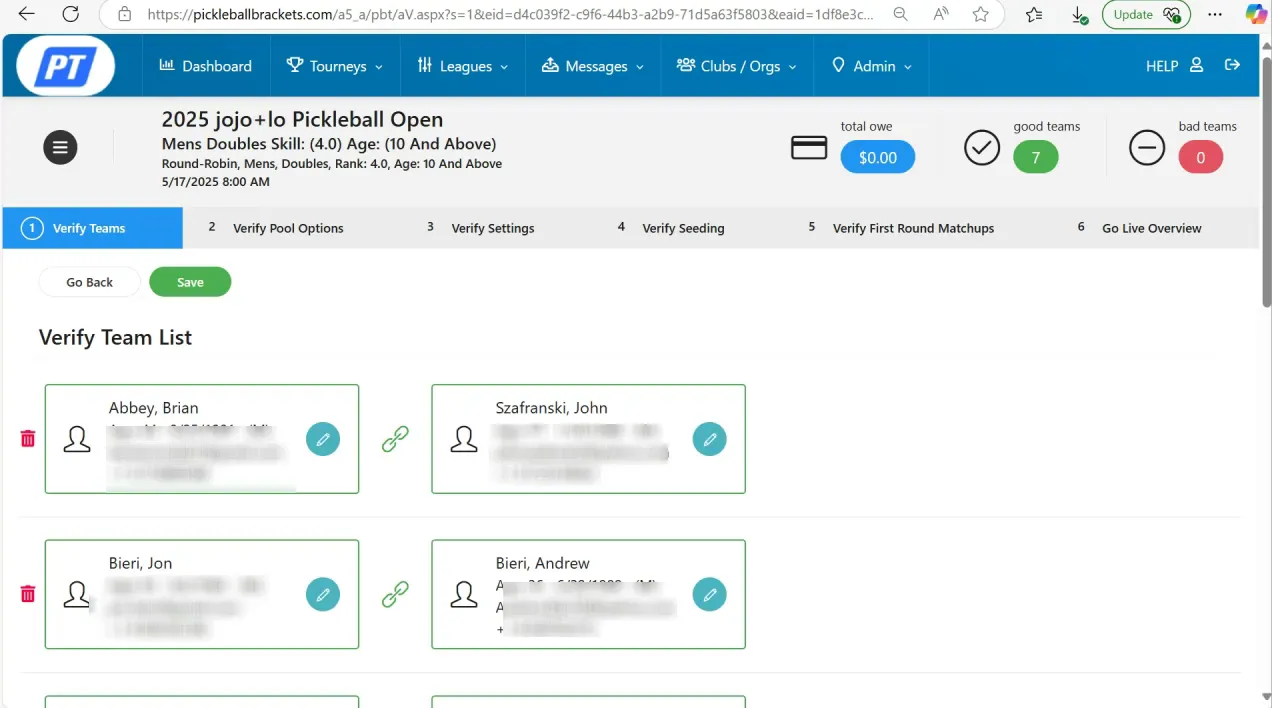
Click Verify Event next to the event you want to finalize.
-
Review the list of teams registered for that event.
During this step you should confirm:
• Each player has a partner (for doubles events)
• Players have completed payment
• No duplicate or incorrect entries exist
Teams missing partners will automatically be excluded to maintain bracket integrity.
After reviewing the teams, click Save, then confirm by selecting Continue.
Step 2: Confirm the Event Format
Next, you will verify the format of the event.
This includes confirming whether the event is:
• Round robin
• Double round robin
• Multi-pool round robin
• Single elimination
• Double elimination
For example, a seven-team round robin may not need to be split into pools, so the system may already be configured correctly.
After confirming the format, click Save and Continue.
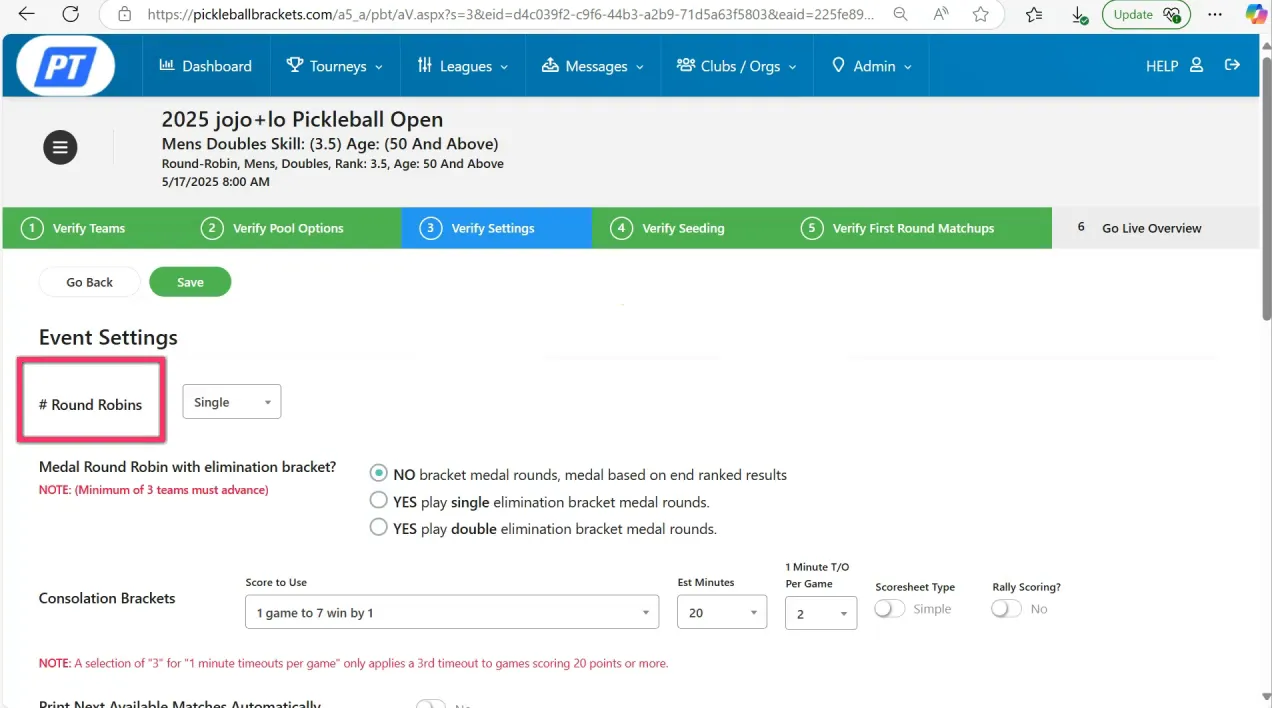
Configuring Round Robin Play
You will then select the number of round robins being played.
Options include:
• Single round robin – each team plays every other team once
• Double round robin – each team plays every other team twice
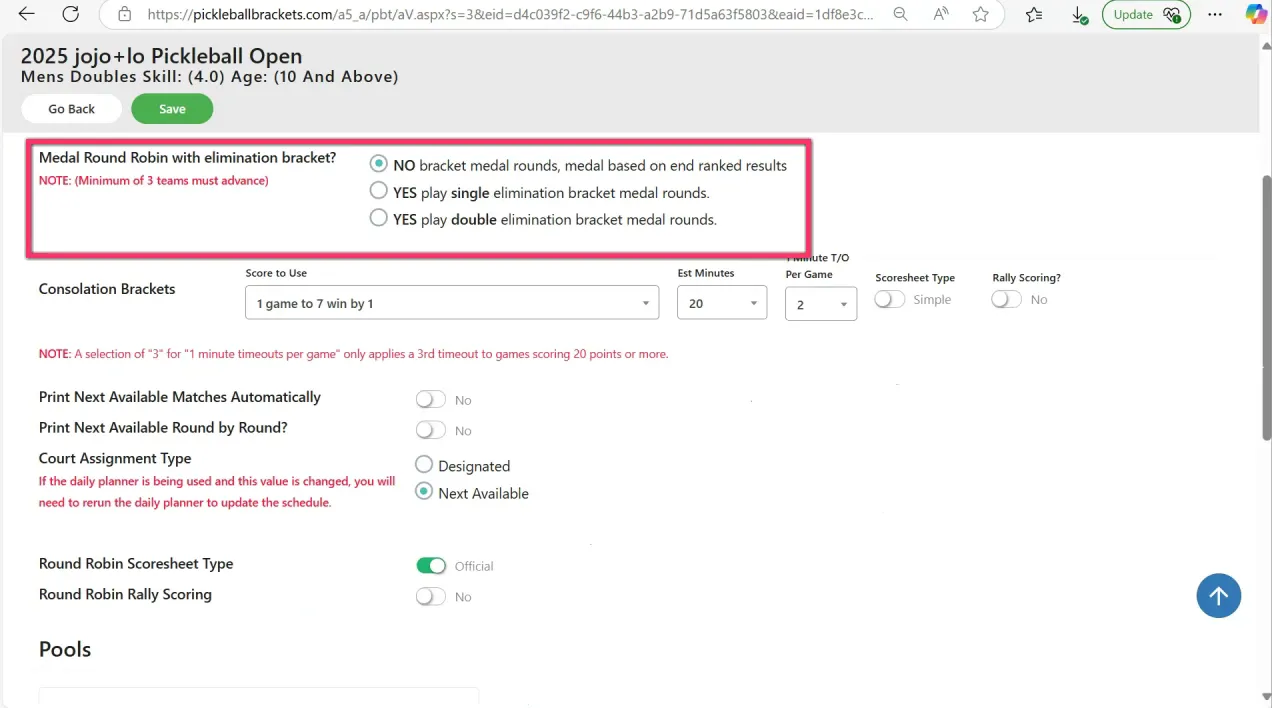
If your event includes a playoff round or medal match after round robin play, you can enable that option during this step.
If you do not plan to run consolation matches, you can skip those settings.
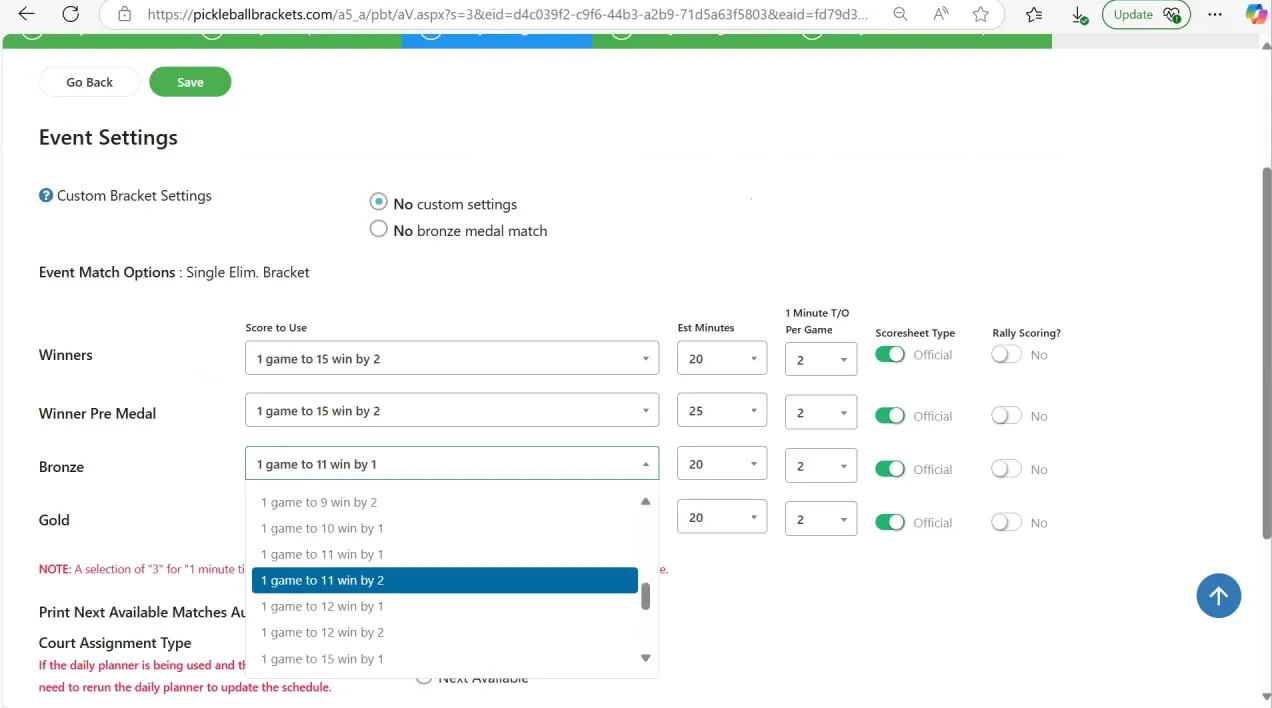
Printing and Court Assignment Settings
Next, configure how matches will be managed during the tournament.
Printing options allow you to generate physical score sheets if needed.
Key settings include:
• Turn printing on or off
• Choose simple or official score sheets
• Decide whether to assign specific courts or next available courts
You will also configure match details such as:
• Match length (for example: one game to 15)
• Win conditions (such as win by two)
• Estimated match duration
These settings should reflect your court capacity and schedule constraints.
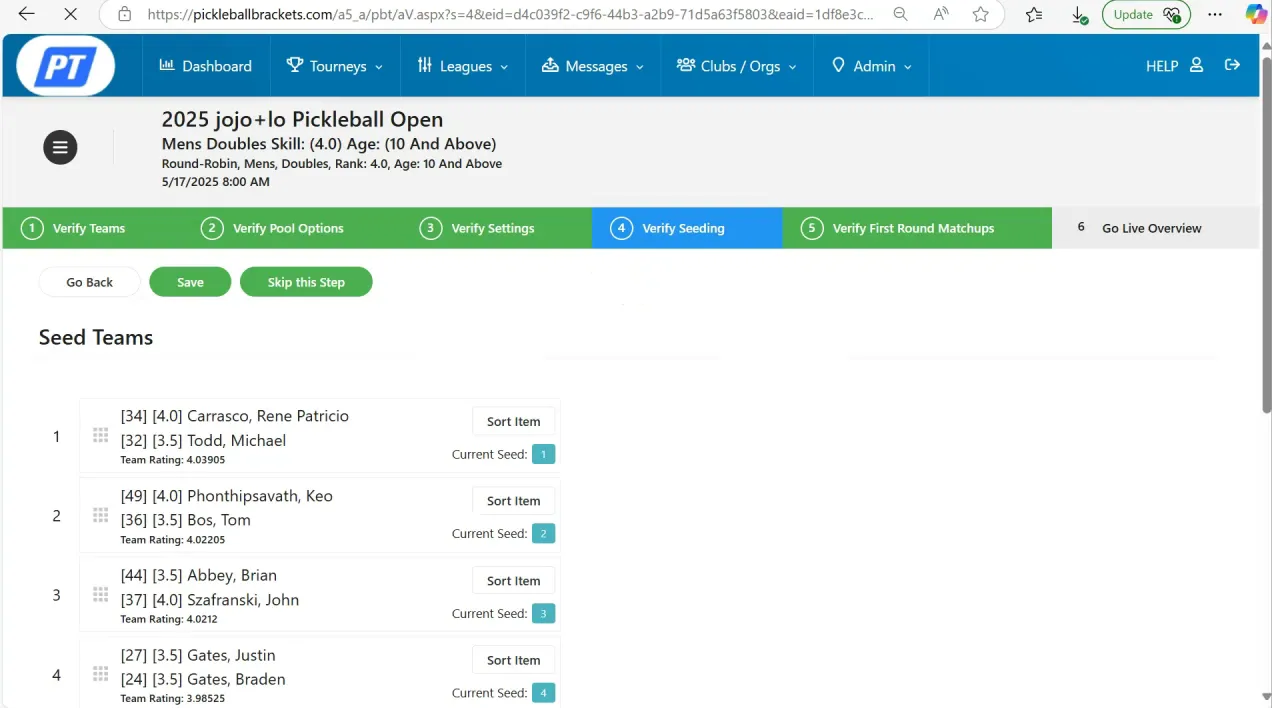
Step 3: Review Seating and Matchups
Next, the system displays the seating arrangement.
You can manually drag and drop teams to adjust seating if needed. However, in most cases it is best to leave seating unchanged because it is based on player ratings.
Manual adjustments are usually only necessary when:
• Players have identical self-ratings
• You need to separate teammates or club members
After seating review, you will see the first round matchups.
If everything looks correct, simply click Save and Continue.
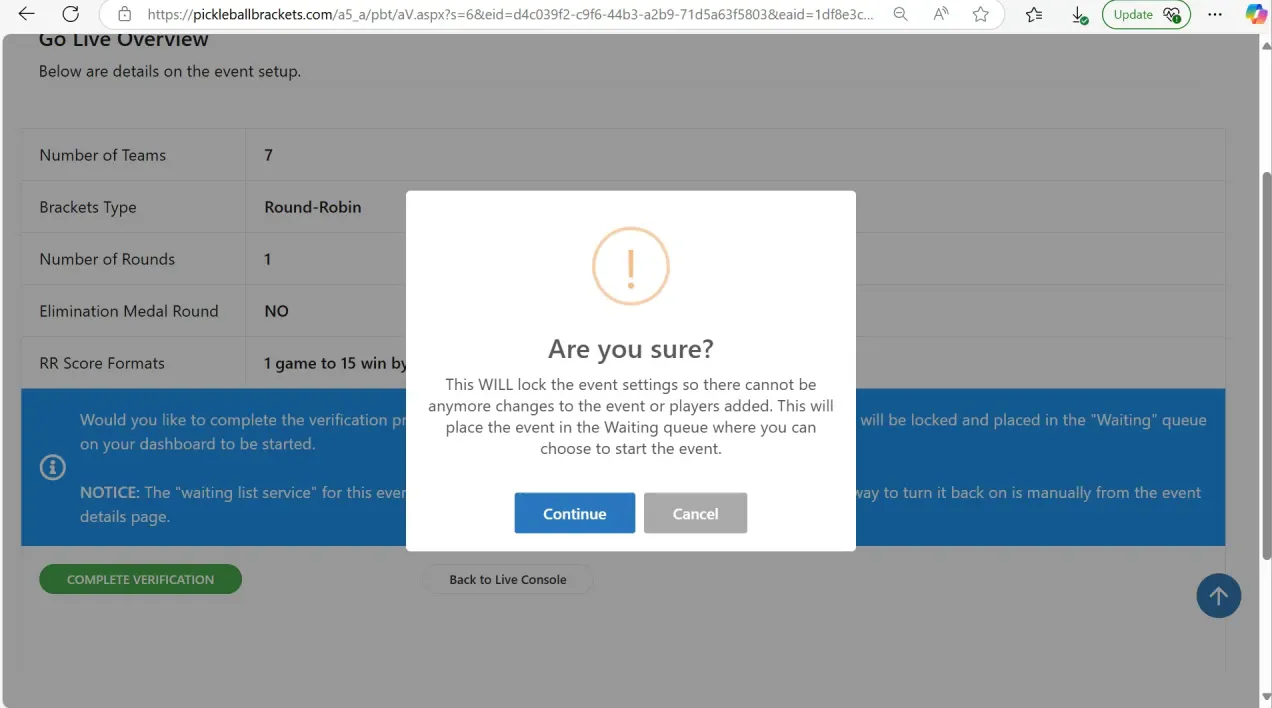
Step 4: Complete the Verification
The final screen shows an overview of your bracket setup.
Take a moment to double-check:
• Number of teams
• Event format
• Match settings
• Court and printing configurations
Once confirmed, click Complete Verification.
Your event will now move into the Waiting section of the Live Console.
Events listed as Waiting are fully verified and ready to begin on tournament day.
Verifying Different Event Types
The verification steps remain mostly the same across different event formats, but there are a few specific considerations.
Double Round Robin Events
For a double round robin event:
• Follow the standard verification steps
• Select Double Round Robin in the format dropdown
After selecting the format:
• Configure printing settings
• Assign courts if needed
• Set match length and estimated duration
Skip seating adjustments unless necessary and complete verification.
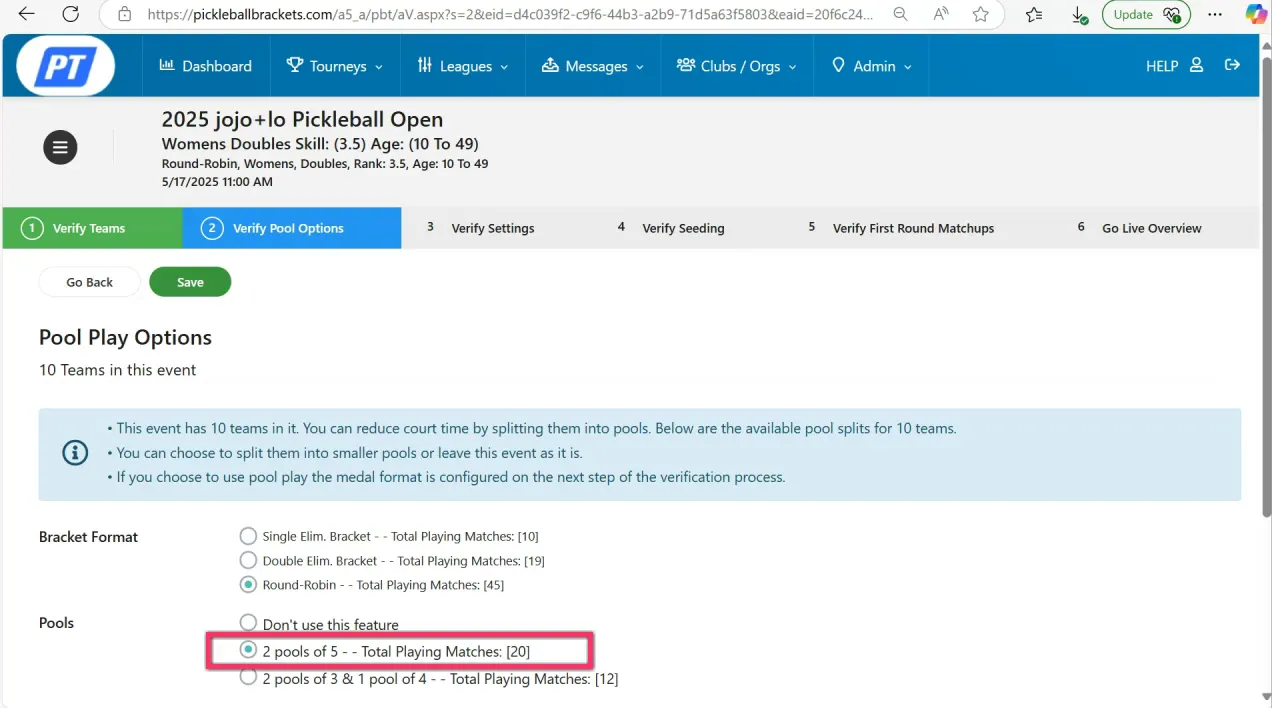
Multi-Pool Events
Large events often require multiple pools.
For example:
• 10 teams may be split into two pools of five teams
When verifying pool events:
• Confirm the pool structure is correct
• Decide whether a playoff bracket will follow pool play
• Select how many teams advance from each pool
Common advancement settings include:
• Top two teams per pool advance
• All teams advance if time allows
You should also verify medal match formats and estimated match times.
Single and Double Elimination Events
Elimination brackets are typically simpler to verify.
For single elimination:
• Confirm the bracket structure
• Verify match settings
• Complete verification
For double elimination:
• Ensure winners and losers bracket formats are correct
• Confirm scoring rules and match duration
Once verified, these events will move into the Waiting section just like round robin events.
Tips for a Smooth Verification Process
To make verification easier and avoid tournament-day issues, follow these best practices.
• Run your tournament through the Simulator first
• Confirm partners and payment status before verifying events
• Double-check your format settings match your tournament rules
• Decide early whether you will print score sheets or use digital scoring
• Avoid manual seating changes unless absolutely necessary
Preparation is the key to preventing issues once matches begin.
Final Thoughts
Verifying events in the Live Console is one of the most important steps in tournament preparation. It ensures your brackets, match formats, and teams are finalized so the tournament can run smoothly from start to finish.
Whether you’re organizing a simple round robin event or managing a large multi-pool tournament with elimination rounds, mastering the verification process will help reduce stress and improve the experience for both players and staff.
For additional training and step-by-step demonstrations of Live Console features, visit the Pickleball Play Solutions YouTube channel, where you’ll find webinars and tutorials designed to help you run tournaments with confidence.
Related articles

Tournament Operations 101: Webinar Alert
12 days ago
-Tyrece Warner

Chasing the pro dream: Five tips from Roscoe Bellamy
Let one of the PPA Tour’s sharpest talents take your game to the next level.
16 days ago
-Pickleball.com Staff

Camila Zilveti’s signature shot: Mastering the Nasty Nelson
Move over, Zane Navratil. There’s a new pro laying claim to this maneuver.
18 days ago
-Victoria Radnothy

Advice from the pros: Tips for amateur pickleball players to level up
Anna Bright, Hunter Johnson, and other stars share valuable lessons.
40 days ago
-Victoria Radnothy